How to set up a kids' art studio at home (and learn to love the mess)
- Written by Naomi Zouwer, Visual Artist and Lecturer in Teacher Education, University of Canberra

Many parents want to encourage their children to be creative. This is not just about training the next Archibald Prize winner. Young people develop important emotional and cognitive skills[1] when they make art.
But at the same time, it can be tricky to know where to start. Or how to overcome the fear of a big clean up.
I am a visual artist and art educator of big and small people. Here are some ways to support your child to set up their own art studio at home.
All you have to do is make a space for them, supply the materials and not get too hung up on the mess!
How to set up a kids studio
First, you need to set up a space or a “kids studio”. Ideally, this is a place where your child can make and leave work in progress.
Artists need time to mull over ideas. If they have to pack up their work at the end of each session, it disrupts the creative process. Artists like to make, take a break, think and go back to their work in spurts. Spurts can be five minutes or five hours.
Not everyone has a separate backyard studio in their home. So your studio could be the dining table or a corner of the lounge room. You can always cover the studio with a tablecloth to signify it is “closed” during dinner or for other activities.
Another excellent option is an easel. Standing at an easel to paint and draw helps the artist see their work better, as it allows them to stand back and look at the proportions of what they are doing.
Kids are also happy to make on the floor! A simple mat can help designate a studio space. The important thing is your child can come and go as the urge takes them.
And you don’t need special lights. Natural light is best as it doesn’t distort the colours and forms you are working with.
How can you encourage them to start?
Under the Reggio Emilio teaching philosophy[2], the environment around a child plays a central role in the process of making learning meaningful.
One way to encourage your child to begin creating is to place freshly sharpened pencils in a jar (not a box that needs opening) on the table with some paper and a provocation. This could be some shells or anything you know your child might find curious. This becomes an offering to “come and draw here”.
This video shows you how to make a mythical beast.You could also have a construction area with a pile of cardboard next to masking tape (which children can tear themselves), scissors and a fully loaded stapler and a few images of houses as a provocation.
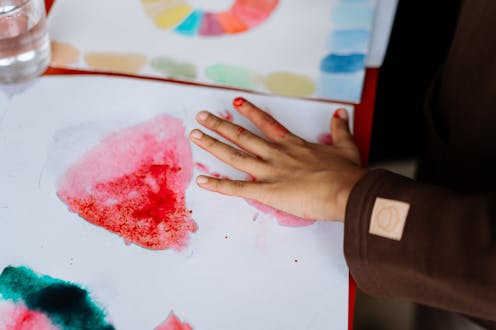
You might like to consider having a wet area and a dry area. Painting, gluing and clay work happen in the wet area and cutting and drawing happen in the dry area.
While it’s great to set up spaces for your child, remember they are the ones using it. So, one way of encouraging them is to invite them to set up and design the space with you. This means they are invested in where things go (and putting things away).
Basic materials for your studio
Pencils
Steiner schools[3] know that using quality art materials enhances the creative process. I love the pencils from German brand Lyra. Prismacolor pencils are another excellent brand.
I also love Lyra’s stubby fat graphite sticks. These are good for all ages (from one and up) because they are sturdy and easily gripped. They also change when you add water, the graphite turns to paint - changing the drawing into a painting!
Good quality pencils will need to be sharpened less, break less when they are dropped and will last a very long time. You can also replace individual pencils, so in the long run it is more economical.
Paper
Good quality paper also makes a difference. The feeling of a pencil dragging across a rough or smooth surface promotes a sensory feeling that you do not get from inferior quality materials.
I like to use heavy watercolour paper. Look for paper thickness (200 to 300gsm) and feel the texture. You are looking for a nice surface (touch lots of paper and you will begin to know what a nice surface feels like). Canson make good water colour pads and you can find something similar at most art shops.
But sometimes all you need is a packet of A3 copy paper or a roll of butchers paper (which you can get from IKEA or Officeworks).
As influential professor of art education Viktor Lowenfeld noted[4], children under four are in the “scribbling” phase of their artistic development. So, young children will burn through paper.
Paint
IKEA make great acrylic and watercolour paints and the colours are vibrant.
I particularly like to use watercolours because they are like magic. They have a beautiful effect as they wash together, and they don’t dry up into blobs of plastic and destroy brushes (if you don’t clean them straight away). It’s easier to come and go from your work without the palaver of “getting the paints out”.
When watercolours dry up, you just “wake them up from their sleep” with water.
Brushes
Use soft bristle brushes for water colour and firm bristle brushes for acrylic paint.
Try to provide an assortment of sizes, of short and long handles and shapes such as round and flat. This will help your young artist explore a range of different marks.
You can get brushes from art stores but also Officeworks and IKEA. Examine the bristles closely: long soft floppy bristles or hard plastic ones are terrible to use and take the fun out painting.
Use recycled materials where possible
Art materials don’t have to cost the earth and you can be sustainable. Save magazines, newspapers, catalogues, flyers and cardboard boxes as they provide endless open-ended opportunities for making.
Things to say and NOT to say
As adults we tend to have decided what we can and can’t do. But do not say things to your child such as, “I can’t draw” or “I’m no good at art”.
Role model a positive can-do attitude and show your child that you can try anything (and it doesn’t matter whether you are “good” or not).
Try the ‘Exquisite Corpse’ drawing game.I like to give my students practical skills they can apply to open-ended activities. That is, there is no prescribed outcome. This is important to keep in mind. If you set your child up with a certain activity but they do something completely different – this is not wrong or bad.
It seems counterintuitive, but avoid saying things such as, “that’s beautiful” or “that’s pretty”. Art isn’t just about making beautiful things it’s also about expressing yourself or trying to make sense of the world. It is a process as much as a product. So, don’t get hung up on the final art work.
So, instead of saying, “Oh that’s a great drawing of a giraffe”, ask them, “what were you thinking about when you made this?”
Keep in mind, there’s also a good chance it’s not even a giraffe! Very young children can change what they are drawing along the way. They might start out drawing their family but end up drawing something completely different. And when you show them the drawing after a week they might have a completely different explanation for the artwork.
So, don’t “correct” your child if they colour outside of the lines or draw something you can’t immediately understand. By the same token, never finish your child’s work for them.
A final word on mess
Creativity can (and should!) look really messy. It’s important to give your child the opportunity to make a mess in order to discover new possibilities, generate ideas and think through materials.
This can understandably be off-putting for parents. But if you have a designated area, then hopefully you can relax and know you are providing your child space to grow and develop creative and critical skills they need for now and in the future.
Naomi Zouwer shows you how to make a zine.You can find more activities and suggestions on Naomi Zouwer’s YouTube channel[5].
References
- ^ emotional and cognitive skills (www.artsednj.org)
- ^ teaching philosophy (www.naeyc.org)
- ^ Steiner schools (alicesteiner.nt.edu.au)
- ^ Viktor Lowenfeld noted (www.d.umn.edu)
- ^ YouTube channel (youtu.be)


