Bike Accessories for Every Cyclist

For any cyclist, whether you're commuting through city streets, touring long distances, or hitting the trails, the importance of having the right bike accessories cannot be overstated. Accessories not only enhance the safety of your ride but also significantly improve comfort and the overall functionality of your bike. They are vital for tackling unforeseen challenges on the road and making your ride as enjoyable and efficient as possible.
From helmets that protect your head and lights that illuminate your path to locks that secure your bike against theft, each accessory serves a critical purpose. This guide will explore a variety of essential bike accessories that cater to different needs and types of cycling. Understanding how to choose and use these accessories can transform your biking experience, making every journey safer, more comfortable, and more enjoyable.
Here are the list of Bikes Accessories that you might need
Helmets: Your Essential Safety Gear
A helmet is arguably the most critical piece of equipment for any cyclist, playing a vital role in protecting against head injuries in the event of an accident. Here's why every rider should wear a helmet and what features to consider when choosing one:
Importance of Wearing a Helmet- Safety First: Helmets are designed to absorb impact and reduce the risk of serious head injuries. Studies have shown that helmets can reduce the risk of head injury by up to 85%.
- Legal Requirements: In many places, wearing a helmet while cycling is mandatory under the law, especially for children.
Different Types of Helmets Tailored for Various Cycling Disciplines
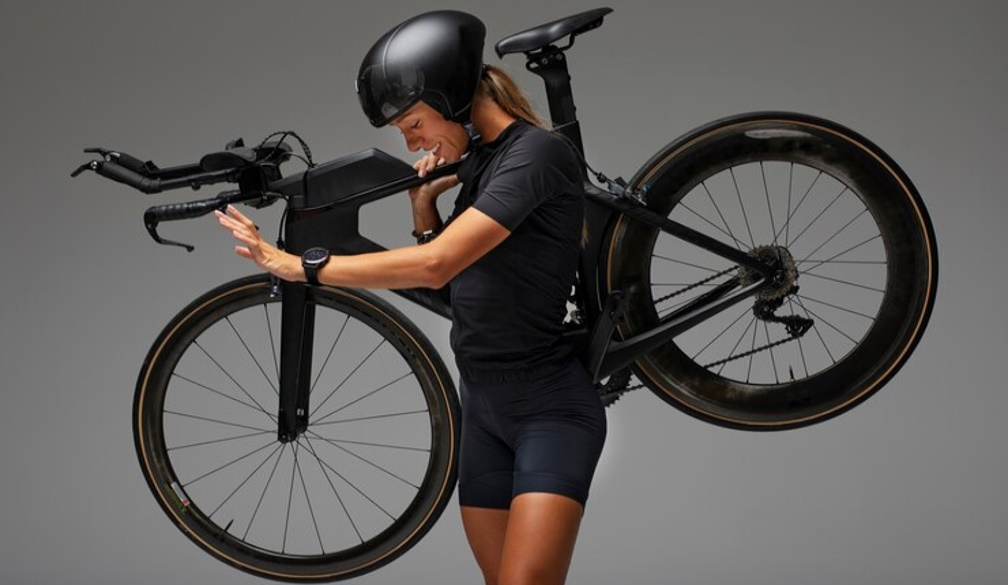
- Road Cycling Helmets: These are lightweight and aerodynamic, designed to reduce drag and enhance air ventilation. They usually feature a sleek design with ample venting to keep the head cool during long rides.
- Mountain Biking Helmets: Built for rugged use, these helmets often provide enhanced rear head coverage. They are sturdier with fewer vents to prevent twigs and debris from entering, and sometimes include a visor for added protection against sun and branches.
- Commuter Helmets: These are versatile and stylish, often equipped with features like LED lights for increased visibility and built-in rain caps. They balance ventilation, durability, and protection suitable for daily use in urban environments.
Key Features to Look for in a Good Helmet
- Fit and Comfort: A good helmet should fit snugly but comfortably. Look for helmets with adjustable straps and sizing systems to ensure a secure fit that can be easily tailored to your head size.
- Construction Quality: The most common materials used are EPS foam with a polycarbonate shell. In-mold construction, where the outer shell and foam liner are fused together, provides more durability and lighter weight.
- Ventilation: Adequate venting is essential to keep your head cool. More vents generally mean better airflow, but can also mean a higher price tag.
- Safety Standards: Ensure the helmet meets safety standards set by organizations like the Consumer Product Safety Commission (CPSC) in the USA or equivalent standards elsewhere.
- Additional Features: Some helmets include features such as MIPS (Multi-directional Impact Protection System) technology, which adds an additional layer of protection against rotational forces in the event of an angled impact.
Choosing the right helmet is a crucial step in ensuring your safety while riding. It’s important not only to choose a helmet that fits well but also one that is appropriate for the type of cycling you do. Invest in a high-quality helmet that meets established safety standards, and never ride without it.
Lights: Ensuring Visibility on the Road
Proper lighting is essential for cyclist safety, especially during early morning rides, late evenings, or under low-light conditions. Lights not only help you see where you are going but also ensure that you are visible to other road users. Here’s a detailed look at why lights are so crucial and how to choose the right ones for your bike.
The Critical Role of Front and Rear Lights in Cyclist Safety- Visibility for Safety: Front lights illuminate the path ahead, helping you navigate roads and avoid obstacles, while rear lights make you visible to vehicles and other cyclists from behind. Both are crucial in preventing accidents.
- Legal Requirements: In many regions, having a set of functional front and rear lights is legally required when riding after dark. This is to ensure both your safety and the safety of others on the road.
Overview of Different Types of Lights
- LED Lights: These are popular due to their efficiency, long life, and low power consumption. LED bike lights range from simple models for basic visibility to high-powered versions for well-lit night riding.
- Rechargeable Lights: Many modern bike lights are rechargeable, offering the convenience of USB charging. This eliminates the need for frequent battery replacements and ensures you can easily charge lights from a computer or any USB charger.
- High-Luminosity Options: For those riding in particularly dark areas or on unlit paths, high-luminosity lights provide extensive illumination, making the path clear and substantially increasing safety.
Tips on Where to Mount Lights for Optimal Visibility
- Front Lights: Mount your front light on the handlebar where it's high enough to light up the road but directed slightly downwards to avoid blinding oncoming traffic. Ensure it's securely fastened and points straight ahead along the path you intend to ride.
- Rear Lights: Attach the rear light to the seat post or the back of a pannier rack if you use one. It should be positioned to be visible from behind and not obstructed by any part of your body or cargo.
- Additional Mounting Points: For added visibility, consider mounting small LED lights on your helmet, backpack, or even on your arms or legs. Moving lights can attract more attention, making you more noticeable to other road users.
- Reflectors and Integrated Lighting: Some bikes come with built-in reflectors, but adding reflective tape or additional reflectors on the wheels can enhance visibility. Some cyclists also opt for lights that integrate into shoes, gloves, or jackets for increased visibility and safety signals.
By equipping your bike with the right type and configuration of lights, you significantly improve your safety during rides in dim or dark conditions. Remember to regularly check that your lights are functioning properly before heading out, especially if you plan to ride in the evening or early morning.
Locks: Securing Your Bike
Protecting your bike from theft is a fundamental concern for any cyclist. A good bike lock is an essential investment that can deter thieves and provide peace of mind. Here’s what you need to know about the necessity of bike locks and how to choose and use them effectively.
Discussion on the Necessity of Bike Locks- Preventing Theft: Bicycles can be high-value targets for theft, especially in urban areas. A robust bike lock is your first line of defense, making it significantly harder for thieves to steal your bike.
- Insurance Requirements: Some insurance policies for bikes require the use of certified locks for coverage to be valid in case of theft, emphasizing the importance of using a good-quality lock.
Comparison of U-locks, Cable Locks, and Chain Locks
- U-locks: Known for their toughness and resistance to tampering, U-locks consist of a metal shackle and a crossbar. They are challenging to cut or break but may limit what you can secure your bike to due to their rigid shape.
- Cable Locks: These are flexible and generally lighter than U-locks, making them easier to transport and use. However, they are less secure as they can be cut more easily with bolt cutters. Cable locks are best used in low-risk areas or as a secondary lock to secure bike components.
- Chain Locks: These locks offer a good balance between flexibility and security. Chains can be wrapped around larger objects, and high-quality chain locks are tough for thieves to cut. They tend to be heavier and bulkier, which can be a drawback for everyday carrying.
Advice on Best Practices for Locking Up Your Bike Securely
- Lock Both Wheels and the Frame: Always aim to secure both the frame and the wheels to an immovable object. Thieves can remove wheels quickly, so consider using additional cable locks or locking wheel skewers if your primary lock doesn't cover both.
- Choose a Secure Anchor: Lock your bike to a solid, immovable object like a designated bike rack or a sturdy pole. Avoid items that can be easily cut, broken, or removed.
- Visibility: Lock your bike in a well-lit, busy area where potential thieves are less likely to risk detection.
- Lock Positioning: Keep the lock as far off the ground as possible. Locks that rest on the ground can be more easily breached with tools like hammers or chisels.
- Routine Checks: Regularly inspect the lock for signs of tampering and wear. Make sure it functions correctly every time you secure your bike.
Incorporating these practices when locking up your bike can drastically reduce the risk of theft. Invest in a high-quality lock that suits your environment and usage, and always be vigilant about where and how you secure your bike.
Pumps and Repair Kits: Be Prepared for Anything
Maintaining your bike in top condition is crucial for ensuring a safe and enjoyable ride. This includes keeping the tires properly inflated and being prepared to handle common mechanical issues. Here's a guide to the essential tools and knowledge you need to manage your cycling maintenance.
Importance of Maintaining Proper Tire Pressure and Having a Repair Kit- Tire Pressure: Proper tire inflation is vital for efficient riding, reducing tire wear, and preventing flats. Correctly inflated tires provide optimal performance, comfort, and safety.
- Repair Kit Necessity: Having a repair kit with you at all times can be a ride-saver, allowing you to address mechanical issues or punctures immediately, ensuring you’re never stranded due to a minor fixable problem.
Types of Pumps
- Floor Pumps: Ideal for home use, floor pumps offer a stable base and a large air chamber to quickly and efficiently inflate bike tires to the desired pressure. They usually feature a pressure gauge to help you inflate tires to their optimal level.
- Portable Mini-Pumps: Compact and lightweight, mini-pumps are designed to be carried on rides. While they don’t match the speed or ease of floor pumps, they are essential for emergency inflations after a flat tire on the road or trail.
Essentials for a Basic Repair Kit: What to Include and How to Use It
- Tire Levers: These are used to remove the tire from the rim, which is the first step in changing a tube after a puncture.
- Spare Tubes or Patch Kit: Carry at least one spare tube that fits your tires or a patch kit to repair small punctures in a pinch.
- Multi-Tool: A good cycling multi-tool includes several sizes of hex keys, screwdrivers, and sometimes even a chain tool, covering most basic on-the-road adjustments and repairs.
- Portable Pump or CO2 Inflator: Essential for inflating your tire after you replace or repair your tube. CO2 inflators are faster but single-use, while mini-pumps can be used multiple times but require more effort.
- Puncture Repair Patches: These allow you to patch a hole in a tube, which is especially useful if you run out of spare tubes.
- Instructions or Knowledge: Familiarize yourself with basic repair techniques such as changing a tire or adjusting a slipped chain. Consider carrying instructions in your repair kit, or better yet, practice these skills at home.
By equipping yourself with the right tools and knowledge, you can handle common bike issues that might occur during your rides. This preparation not only enhances your safety but also increases your confidence and independence as a cyclist.
Hydration Solutions: Water Bottles and Holders
Staying hydrated while biking is crucial for maintaining performance and avoiding dehydration, especially on longer rides or in warmer weather. Here’s how to ensure you have easy access to hydration and what options are available to suit your needs.
The Need for Easy Access to Hydration While Biking- Continuous Hydration: Regular water intake is essential to replace fluids lost through sweat and to maintain optimal physiological functions. Dehydration can lead to fatigue, reduced coordination, and muscle cramps, all of which can negatively impact your ride.
- Convenience: Having easy access to water through well-placed bottles and holders means you can hydrate without stopping, keeping your momentum and focus on the road or trail.
Types of Water Bottles and Holders
- Standard Water Bottles: The most common type, these fit into a basic cage attached to the frame. They're typically made from plastic, are lightweight, and come in various volumes.
- Aerodynamic Bottles: Designed for road racers and triathletes, aerodynamic bottles and their holders are shaped to minimize air resistance. They are often mounted on the frame or handlebars to allow easy access without compromising speed.
- Insulated Water Bottles: These are ideal for extreme temperatures—hot or cold. Insulated bottles help keep your drink cold in summer and prevent freezing during winter rides.
- Hydration Packs: For mountain bikers or longer distance riders, hydration packs are a viable alternative to bottles. Worn as a backpack, they typically have a larger capacity than bottles and include a tube for easy sipping while riding, allowing hands-free hydration.
Installation Tips for Bottle Holders
- Frame Mounting: Most bikes come with pre-drilled holes in the frame for mounting a bottle cage. These holes are usually located on the top tube, down tube, or seat tube. Ensure that the cage is securely attached with bolts.
- Handlebar Mounting: For those who prefer easy access or have frames without mounting holes, handlebar-mounted holders are an option. These are particularly useful for smaller frames or children’s bikes where frame space is limited.
- Adjustability and Fit: Choose a bottle cage that tightly fits your bottle of choice. A loose fit can lead to rattling or even losing your bottle during rough rides. Some cages offer adjustable collars or flexible materials to accommodate different bottle sizes.
- Tool-Free Options: Some modern cages and holders come with tool-free mounting systems, using straps or innovative clamps for easy attachment and removal.
Proper hydration is a key element of successful cycling, and having the right tools to carry and access your water easily is essential. Whether you opt for a simple bottle and cage setup or a more advanced hydration pack, make sure it meets your specific cycling needs and preferences.
Fenders: Keeping Clean and Dry
Fenders play a crucial role in enhancing the comfort and cleanliness of your ride, especially in wet or muddy conditions. They are particularly valuable for commuters and mountain bikers who ride in varied weather conditions. Here’s a closer look at the benefits of fenders, the types available, and tips on choosing and installing them.
Benefits of Installing Fenders on a Commuter or Mountain Bike- Protection from Splashes: Fenders block water, mud, and road debris from being thrown up by the wheels, keeping you and your bike cleaner and drier.
- Enhanced Comfort: By reducing the amount of water and mud that hits you, fenders make your ride more comfortable, particularly in rainy or muddy conditions.
- Bike Maintenance: Fenders protect critical parts of your bike, such as the drivetrain and brakes, from excessive dirt and moisture, which can extend the life of these components.
Differences Between Permanent and Clip-On Fenders
- Permanent Fenders: These are attached directly to the frame and fork via mounting points. They offer more coverage and are generally more robust and stable, making them ideal for regular riders or those who frequently encounter wet conditions.
- Clip-On Fenders: These are designed for easy attachment and removal, ideal for cyclists who only occasionally need fenders or who use multiple bikes. While they typically provide less coverage than permanent fenders, they are flexible and convenient for unpredictable weather.
Guidance on Choosing and Installing Fenders Based on Bike Type and Use
- Choosing Fenders:
- Commuter Bikes: Look for full-length fenders that offer maximum protection as these bikes are often used daily in various weather conditions.
- Mountain Bikes: Opt for fenders that are sturdy yet flexible enough to handle rough trails. Shorter, more durable fenders are often sufficient and less likely to catch on trail debris.
- Road Bikes: Aero fenders that are lightweight and sleek might be preferred to maintain the bike’s aerodynamic profile while providing necessary protection.
- Installation Tips:
- Check Compatibility: Ensure the fenders are compatible with your bike’s frame and wheel size. Some bikes have specific mounting points for fenders, while others may require universal fenders that fit a variety of bikes.
- Secure Attachment: For permanent fenders, use all available mounting points to secure the fenders to the frame and fork. This prevents rattling and ensures the fenders stay in place.
- Adjustment for Optimal Coverage: Adjust the fender position to minimize the gap between the fender and the tire. This maximizes protection and minimizes the chance of debris getting caught.
Properly chosen and installed fenders can significantly improve your riding experience by keeping you clean and dry. They also contribute to the longevity of your bike by protecting critical components from excessive wear and corrosion. Whether you’re a daily commuter or an occasional adventurer, consider equipping your bike with the appropriate type of fenders for your riding needs.
Bells and Horns: Communicating with Fellow Travelers
Bells and horns are vital accessories for any cyclist, serving as crucial tools for communication and safety on the road or trail. Here’s an overview of why these simple devices are essential and how to choose the right one for your riding environment.
The Importance of Bells and Horns in Preventing Accidents- Alerting Others: Bells and horns help you alert pedestrians, other cyclists, and motorists of your presence, especially in situations where they may not see you. Using a bell or horn can prevent collisions and ensure safer passage for everyone.
- Legal Requirements: In many places, having a bell or horn on your bicycle is required by law, particularly in urban areas where cyclists frequently share space with pedestrians and other traffic.
Various Types of Bells and Horns Suitable for Different Environments
- Classic Bells: Ideal for city riding and busy bike paths, classic bells produce a clear, gentle ring that is usually enough to alert pedestrians and other bikers. They come in various styles and mounts to match personal taste and bike aesthetics.
- Electric Horns: For environments where louder volume is necessary, such as in heavy traffic where a bell might not be heard, electric horns provide a robust sound that can cut through ambient noise.
- Air Horns: These can be extremely loud and are suitable for situations where it’s critical to make your presence known over longer distances or over the din of urban noise. They are particularly useful for commuting in areas with heavy vehicle traffic.
- Bar-end Bells: Integrated into the ends of handlebars, bar-end bells offer a sleek, unobtrusive option that is always at hand. These are perfect for road bikes and commuters who prefer a clean handlebar setup.
- Clip-on Bells and Horns: For riders who prefer a portable option or use multiple bikes, clip-on bells and horns can be easily transferred between bikes and removed when not needed.
Installation and Usage Tips
- Proper Placement: Install your bell or horn where it can be easily reached without removing your hands from the handlebars. This is typically near the grips or brake levers.
- Audibility Test: Test the sound in a quiet area before heading out to ensure it’s loud enough to be heard in your typical riding environment.
- Usage Etiquette: Use your bell or horn judiciously. A gentle ring or beep is usually sufficient to alert others without causing alarm. Save louder blasts for situations where a quick response is necessary to avoid an accident.
Incorporating a bell or horn into your bike setup is a simple, effective way to enhance your safety and the safety of those around you. Choose a model that suits your environment and personal style, and make a habit of using it to communicate your presence. This small addition can make a significant difference in navigating shared spaces safely and effectively.
Bags and Racks: Enhancing Your Bike’s Carrying Capacity
For many cyclists, especially those who commute or undertake long tours, having the ability to carry items efficiently and securely on their bike is essential. Bags and racks can transform a simple bike into a cargo-carrying vehicle, making it immensely more practical and versatile. Here’s a look at the convenience of these accessories, the various types available, and how to choose the right setup for your needs.
The Convenience of Using Bags and Racks for Transporting Items on Your Bike- Enhanced Utility: Bags and racks allow you to carry everything from daily essentials and work equipment to groceries and camping gear without affecting your ability to ride comfortably.
- Distribution of Load: Properly configured bags and racks help distribute the weight of your cargo evenly, which can improve your bike's stability and handling.
- Reduced Physical Strain: By offloading the weight from your back to your bike, these accessories help prevent the fatigue and discomfort associated with carrying a heavy backpack or shoulder bag.
Descriptions of Different Types of Carrying Solutions
- Panniers: Attached to racks on the rear or front of the bike, panniers are side bags that can carry heavy loads without impacting the bike’s center of gravity. They are ideal for commuting and touring due to their large capacity and ease of access.
- Saddlebags: Smaller than panniers and mounted under the seat, saddlebags are perfect for carrying essential tools, a repair kit, or snacks. They’re typically used by road cyclists and mountain bikers for their compact size and minimal impact on aerodynamics.
- Handlebar Bags: Mounted at the front, these provide easy access to items without needing to stop and dismount. They are a good choice for items you need frequently, like maps, phones, or cameras.
- Racks: These are the structural frames mounted over the rear wheel (and sometimes the front wheel) of the bike. Racks are essential for supporting panniers and can also be used with elastic cords to secure loose items directly to the rack.
Considerations for Choosing the Right Bags and Racks Based on Your Carrying Needs
- Weight Capacity: Consider how much weight the bags and racks can support, and ensure they meet your typical load requirements.
- Compatibility: Make sure the rack or bag fits your bike model. Some racks require specific mounting points that may not be available on all bikes.
- Durability and Waterproofing: Look for durable materials that can withstand the rigors of your usage, especially if you frequently ride in rough conditions or adverse weather. Waterproof bags and panniers are crucial for wet climates.
- Ease of Attachment and Removal: If you need to remove the bags frequently, look for models that offer quick-release mechanisms.
- Balance and Handling: Test the setup with a typical load to see how it affects your bike’s handling. Adjust the positioning as needed to maintain good balance and ensure comfortable riding.
By carefully selecting the appropriate bags and racks for your bike, you can significantly increase its functionality and convenience. Whether you’re a daily commuter, a weekend adventurer, or an occasional shopper on two wheels, there’s a configuration that will meet your needs and make your cycling experience more enjoyable and practical.
Conclusion
Equipping your bike with the right accessories is more than just enhancing its appearance; it's about optimizing your ride for safety, efficiency, and convenience. From helmets that protect in case of accidents to lights that ensure visibility, each accessory serves a purpose that can significantly improve your cycling experience.


