

5 Tips For Cleaning Up After A Home Project
- Written by: NewsServices.com
Remodelling your home is a worthy investment to upgrade and increase its value. Nevertheless, a home project generates plenty of dirt, dust, and debris that must be removed for your family to fully appreciate the renovation and its end result.
Fortunately, there are a few simple suggestions you can take to ensure the newly constructed rooms are squeaky clean enough for you to open up the area and utilise the revamped room.
Here are five tips for cleaning up after a home project:
- 1. Prepare The Construction Area
Before you begin a deep dive into the renovation cleaning, it’s essential to prepare the spruced-up area first to prevent dirt from spreading to other parts of your home.
You can section off the construction site using a panelled room divider or a floor-to-ceiling tarpaulin sheet so there’s no foot traffic moving in the area other than you can your contractor.
Then, cover your furniture and walls with a drop sheet and the floor with cardboard to protect them from dust. The windows should be sealed with some stretch film if your home project is a remodelled bedroom or kitchen; close cabinet and wardrobe doors and seal gaps with tape.
Any construction rubble in the way of laying down a flooring cover should be moved aside until it can be disposed of properly.
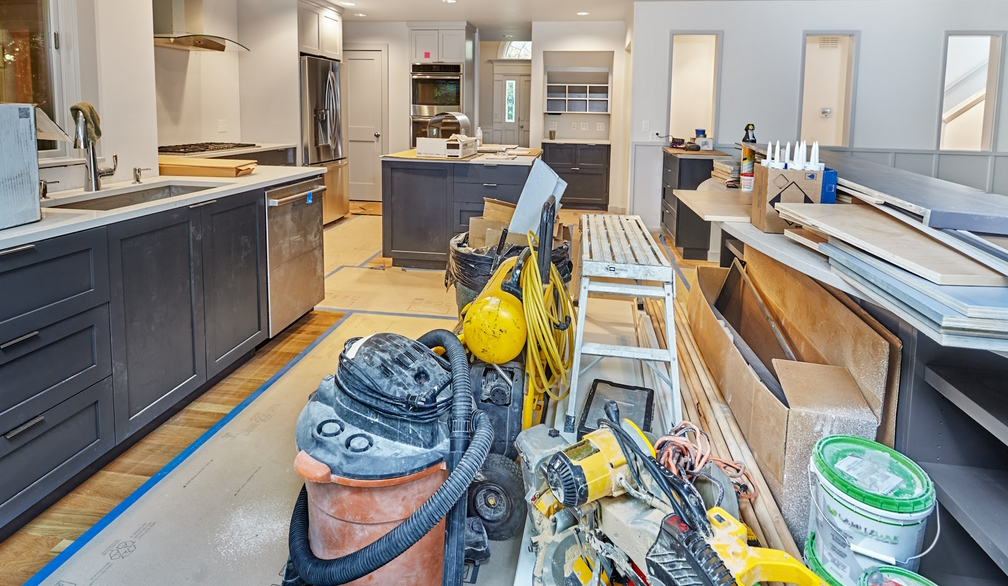
- 2. Remove Debris And Clutter Carefully
Your home project can't be completed without clutter being removed carefully. Thus, if you have minimal clutter, such as empty paint cans and leftover pieces of small wooden boards, you can gather them into a rubbish bag and dispose of them at your local refuse removal.
However, large and heavy debris, consisting of heaps of bricks, glass and tile, wooden beams, and metal, can be hazardous to move on your own. So, you can hire a professional rubbish removal service to help speed up the clean up process and safely eliminate the junk. This then gives you a cleared room with enough space to reach all areas of the room for a thorough scrubbing.
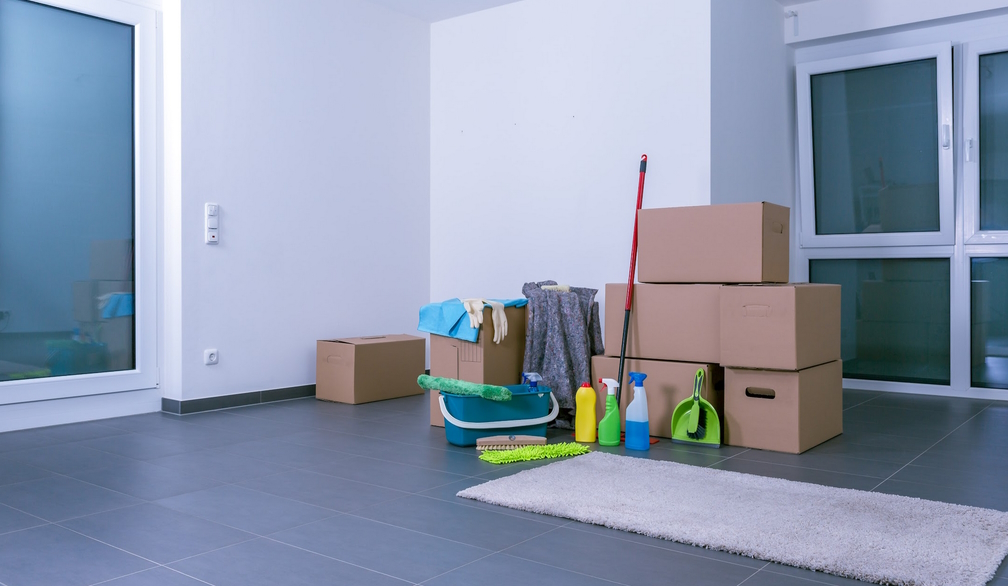
- 3. Gather Your Supplies Early
A good cleaning will require some equipment and supplies to complete the job. Henceforth, it’s necessary to gather gathering everything you need and have them present in the renovated room for time efficiency is necessary. This includes protective gear to protect your health from hazards in the air and chemical soaps.
Depending on the type of mess you’ll be cleaning, the most important tools to have on hand are:
Broom and mop;
Vacuum cleaner and duster;
Microfibre cloth, sponge and a squeegee;
Step ladder;
Cleaning solution; and the like.
Once you have these essentials, you can add goggles, rubber gloves, and a dust mask to wear and keep your eyes, airways, and skin clear of irritants. Furthermore, you can buy an all-purpose disinfectant cleaner or create your homemade cleaning solution if you prefer an alternative to household chemical cleaners.
- 4. Clean Everything From Top To Bottom
The best way to remove dirt without spreading it is to wipe down the renovated room from the ceiling to the wall trim. You should ideally start with dry wiping using a cloth to lift the dust from all surfaces.
Start at the top of the walls, then move onto the windows in a horizontal down motion. This should include any items you have in the room, such as bedroom lamps, bookshelves, side tables and shelf ornaments.
Next, furniture and upholstery can be vacuumed and scrubbed with a sponge and furniture cleaner to remove dust from the fabric. Carpets can be steam cleaned, while wooden or tiled flooring will do well with a good mopping.
Once you start wet wiping, remember to clean overlooked spaces and objects like inside light fixtures, door handles, window frames, appliances and curtains. Polish can be applied as a final step to give the room a clean glossy look.
- 5. Ventilate The Air
Even after a deep clean, ventilation is still key for removing dust, debris and paint particles to make the air breathable again. Thus, at the end of your cleaning process, keep the windows and doors open for the rest of the day to allow better wind circulation.
If you don’t get enough air outside coming in, you can use an air purifier to filter out any lingering substances. Just be sure that your ventilation system has been wet wiped and cleared of dust in the grates, vents and filters to provide your family with healthy air quality post-home project.
Conclusion
The essential tip for cleaning up after a home project is to section off the room and layout covers to protect your belongings from dust. This will allow you to effectively remove the rubble and start cleaning from the top down with the right tools and protective equipment.
Finally, ventilation will ensure that your home gets clean air circulation at the end of your cleaning process. This can be done by opening windows and doors or using air purifiers. If this seems like too much work, you can always turn to professional cleaning services in Melbourne. Experienced cleaners can swiftly and effectively tackle the job, ensuring your home is spotless with minimal hassle.
With these suggestions, your renovated room can be cleaned and ready for use soon after completing your home project.