


How to Apply Epoxy Garage Floor Coating
- Written by: NewsServices.com
When you decide to resurface your garage floor, you can improve the look of it even it if is rough. You can make the surface look great by choosing an epoxy coating. Some people call this type of coating an “epoxy paint” but epoxy and paint are completely different products and have different chemical make up. An epoxy coating is a tough and durable coating but there is a bit of an involved process to its application. If you carefully prepare and organize your approach to the application of epoxy, you will have a great chance of success. When you are shopping for a garage floor epoxy product, those items can vary so you will need to review the instructions on whichever product you decide to utilize.
Garage Floor – Epoxy Coating Kits
When you decide to purchase an epoxy floor coating for your garage floor you will find that these coatings are sold commonly in kits containing your product which is a two-part epoxy, a solution for etching and instructions for completion of the project. You may have a difficult time finding a product in a colour other than gray, but you may find an off-white colour or a brown option. Your kit will contain a list of any additional supplies that are required for the application of your coating, so be sure to carefully read all instruction before you get started on your epoxy application project.
Floor Preparation – the Starting Point
You are going to get the best results in applying your product when you ensure that the floor that you are applying the product to is in the best shape possible. Cracks and chips will need to be repaired and any spills will need to be cleaned up as best as you can. New concrete is the ideal canvas for epoxy, but older concrete will also work if you take the time to make the necessary repairs and prepare the surface for the epoxy. If there are minor cracks and chips, you can easily repair those with a simple concrete patch product. All areas that you patch should be dry and cured before you commence your epoxy application. Once the areas are patched, you want to ensure that you have also degreased the concrete and the surface has been etched as per the recommendation of the epoxy manufacturer.
Tools and Equipment that you will Need
To get started with your epoxy application, you will need to have the proper tools and equipment on hand. You should have a broom, a shop vacuum that is good for wet and dry use, a garden hose, a wire brush, gloves, protection for your eyes, a paint brush, a paint roller, and a handle for your paint roller. You will also need some products and materials for the floor including a reliable concrete degreaser, your chosen epoxy floor coating, painter’s tape, and sheeting. For a more advanced and uniform application, many professionals also use a spray cartridge grade coating system, which allows precise control and faster coverage, especially for larger or industrial surfaces.
Step one: Floor Cleaning and Preparation
The initial step is to clean the floor and remove any grease that is lying on the surface. You can utilize a broom and a wet-dry vacuum to remove debris from the surface of your garage floor. Grease should be removed using a degreasing product and a wire brush. Once you have scrubbed the floor to remove the grease, you will need to rinse the degreaser from the floor using the hose and then let the floor sit to dry completely.
Step two: Concrete Etching
You will need to etch the concrete floor with the use of an etching solution that is included with your epoxy flooring product. Follow the directions on the package and mix the etching product together with water as per the directions. You will then pour the solution onto the surface of your garage floor and incorporate it into the floor by using a brush or a broom. The product will fizz and foam and this lets you know that the product is working to prepare the surface. Next you will need to carefully rinse the area with a hose and let the concrete once again dry for about two to three days. Use safety glasses and gloves when you are etching the concrete floor. Wear long sleeves and pants and, if possible, breathing protection or a mask. The solutions designed for etching are diluted muriatic acid and this can be harmful if you breath it in or it meets your skin.
Step three: Room Preparation
Go around the room and apply painter’s tape to the bottom of all walls. You should tape plastic sheeting around the bottom area of the walls and remove any baseboards so that you can get the product as close to the wall as possible and eliminate the need to cut in edges using a brush.
Step four: Mix Epoxy Product
The epoxy product is comprised of two parts being a resin (“paint”) and a catalyst (“hardener”). You will need to mix these two products just before they are applied. You will need to stir the paint and then start to add the catalyst while you are stirring the mixture. Once you have added all the catalyst, stir together for several minutes until both products are completely combined.
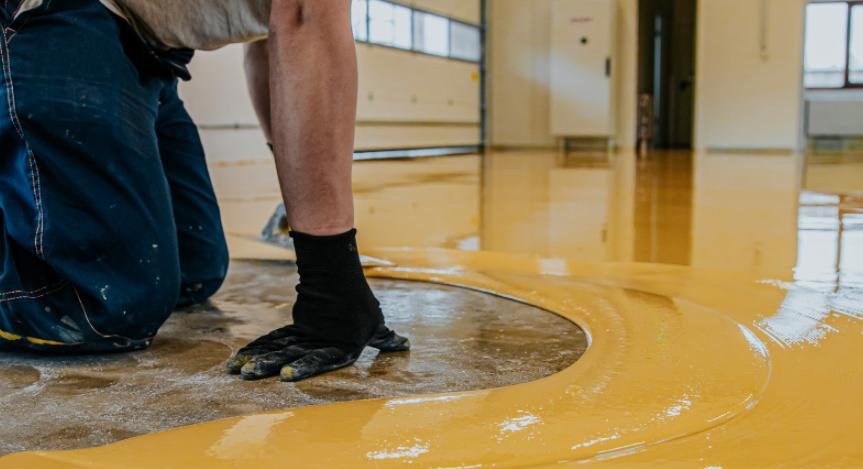
Step five: Applying Epoxy to Concrete
Once the epoxy mixture is combined, you are ready to apply the coating. You have about two hours to complete this job and less if you are working in hot weather. Ensure that the garage is very well ventilated during the application and while the epoxy is curing. Using the paintbrush, cut in around the edges of the floor and then use the roller to spread the epoxy over the remainder of the floor. If you have help you can have another person do the cutting in while you follow around with the roller and apply the epoxy. Maintain the moisture of the edges with the roller by going over the areas that have epoxy applied to them and ensuring that the coating is even. If you will apply a second coating, wait for a minimum of twelve hours before you apply it.
Step six: Allow the Floor to Dry Completely
You should not walk over the surface where you have applied the epoxy until twenty-four hours have elapsed. If possible, wait for a week or two before you park a vehicle in the garage.
The application of epoxy flooring is a great way to ensure that you garage floor stays looking new for many years to come. If you do not have the patience to do the job, consider hiring a professional company to do the job for you. Epoxy is a versatile product that will last for quite some time while protecting your concrete but be sure to be prepared in advance and completely read all instructions before getting started. You should also invest in some decent garage metal cabinets so that everything is properly stored and off your new floor.