


5 Critical Steps for Leak-Proof Hydrogen Pipe Installation
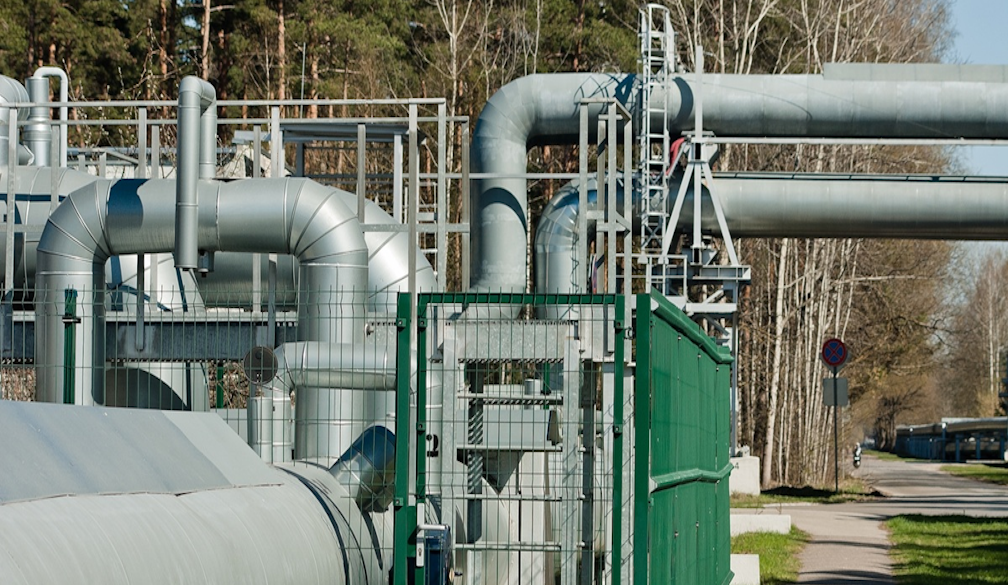
Hydrogen, the universe's most abundant element, is rapidly gaining traction as a clean energy carrier. But harnessing its power requires careful handling, especially when it comes to infrastructure. Installing a hydrogen pipe system isn't just about joining segments; it's about ensuring safety, efficiency, and longevity. Leaks, even minuscule ones, can lead to significant energy loss, safety hazards, and costly repairs. Are you ready to delve into the essential steps that guarantee a leak-proof installation? Because getting it right from the start is paramount. For those seeking reliable options for the supply of hydrogen tube solutions, exploring options such as those offered by IBEX Australia is a good starting point. Learn more about the hydrogen pipe for your needs.
The integrity of a hydrogen infrastructure project hinges on meticulous planning and execution. This article unveils five critical steps to achieve a leak-proof hydrogen pipe installation. From material selection to rigorous testing, we'll explore each stage in detail, providing you with the knowledge to ensure a safe and efficient hydrogen transport system.
1. Choosing the Right Materials: A Foundation for Safety
Selecting the appropriate materials is the cornerstone of any successful hydrogen pipe installation. Hydrogen, due to its small molecular size, can permeate through many common materials, leading to embrittlement and eventual failure. This is why careful consideration must be given to the material's compatibility with hydrogen.
Stainless Steel: The Go-To Option
Austenitic stainless steels, particularly 316 and 304 grades, are often favoured for their excellent resistance to hydrogen embrittlement. However, even with stainless steel, it's crucial to specify low-carbon grades (e.g., 316L, 304L) to minimise the risk of carbide precipitation, which can compromise the material's integrity. Think of it like choosing the right ingredients for a cake – the quality of the ingredients directly impacts the final product.
Polymers: A Cautious Approach
While polymers offer advantages like flexibility and corrosion resistance, their permeability to hydrogen is a major concern. If polymers are considered, it's essential to select materials specifically designed for hydrogen service, such as specialised fluoropolymers or composite materials with permeation barriers. These materials are engineered to minimise hydrogen leakage and maintain their structural integrity over time. It's like choosing the right container for a volatile substance – you need one that won't react or degrade.
Material Certification: Ensuring Quality and Compliance
Always demand material certifications to verify that the chosen materials meet the required standards and specifications for hydrogen service. These certifications provide assurance that the materials have been tested and proven to withstand the harsh conditions associated with hydrogen transport. It's akin to getting a building permit – it ensures that the construction meets safety and regulatory requirements.
2. Precision Welding and Joining Techniques: Minimising Leak Paths
The joints in a hydrogen pipe system are potential weak points where leaks can occur. Therefore, employing precise welding and joining techniques is crucial for creating a leak-proof seal. Think of welding as the glue that holds the system together – a weak bond will inevitably lead to failure.
Orbital Welding: The Gold Standard
Orbital welding, an automated welding process, offers superior control and consistency compared to manual welding. It ensures uniform weld penetration and minimises the risk of defects, such as porosity and incomplete fusion, which can create leak paths. It's like using a precision instrument instead of a hammer – the results are far more accurate and reliable.
Proper Joint Design: Maximising Strength and Seal Integrity
The design of the joints themselves plays a crucial role in preventing leaks. Butt welds are generally preferred over fillet welds, as they provide a smoother transition and reduce the stress concentration at the weld. Additionally, using backing rings or consumable inserts can help ensure full penetration and prevent weld defects. It's like designing a bridge – the structure must be engineered to withstand the forces it will encounter.
Welder Qualification: Ensuring Competence and Expertise
Only qualified and certified welders should perform welding on hydrogen pipe systems. Welder qualification ensures that the welders have the necessary skills and knowledge to produce high-quality welds that meet the required standards. It's like hiring a licensed electrician – you want someone who knows what they're doing.
3. Surface Preparation and Cleaning: Eliminating Contaminants
Contaminants on the surfaces of the hydrogen pipe and fittings can interfere with the welding process and create leak paths. Proper surface preparation and cleaning are essential for ensuring a strong and leak-proof joint. Imagine trying to paint a dirty wall – the paint won't adhere properly.
Mechanical Cleaning: Removing Surface Imperfections
Mechanical cleaning methods, such as wire brushing and grinding, can remove surface imperfections, such as rust, scale, and weld spatter, which can compromise the integrity of the joint. These methods should be performed carefully to avoid damaging the base material. It's like sanding wood before applying varnish – it creates a smooth surface for optimal adhesion.
Chemical Cleaning: Removing Grease and Oils
Chemical cleaning with solvents can remove grease, oils, and other contaminants that can interfere with the welding process. It's important to select solvents that are compatible with the materials being cleaned and to follow the manufacturer's instructions carefully. It's like washing dishes before putting them in the dishwasher – it removes the bulk of the grime.
Post-Weld Cleaning: Removing Residue
After welding, it's essential to clean the weld area to remove any residual flux, spatter, or other contaminants that may be present. This can be done with a wire brush, a solvent, or a combination of both. It's like cleaning up after a construction project – you want to remove all the debris.
4. Non-Destructive Testing (NDT): Detecting Hidden Flaws
Even with the most careful welding and joining techniques, flaws can still occur. Non-destructive testing (NDT) methods are used to detect these hidden flaws without damaging the hydrogen pipe. Think of NDT as a medical check-up for the pipe – it identifies potential problems before they become serious.
Radiographic Testing (RT): X-Ray Vision for Pipes
Radiographic testing (RT) uses X-rays or gamma rays to create an image of the weld. This image can reveal internal flaws, such as porosity, cracks, and inclusions. RT is a highly effective method for detecting a wide range of defects. It's like using an X-ray to find a broken bone – it allows you to see inside the body without surgery.
Ultrasonic Testing (UT): Sound Waves for Flaw Detection
Ultrasonic testing (UT) uses high-frequency sound waves to detect flaws. The sound waves are transmitted into the material, and the reflected waves are analysed to identify any discontinuities. UT is particularly effective for detecting surface and near-surface flaws. It's like using sonar to locate objects underwater – it uses sound waves to "see" in the dark.
Dye Penetrant Testing (PT): Revealing Surface Cracks
Dye penetrant testing (PT) uses a coloured dye to reveal surface cracks and other discontinuities. The dye is applied to the surface, allowed to penetrate into any cracks, and then removed. A developer is then applied, which draws the dye out of the cracks, making them visible. It's like using a magnifying glass to examine a small object – it makes the details more visible.
5. Pressure Testing and Leak Detection: The Ultimate Verification
The final step in ensuring a leak-proof hydrogen pipe installation is pressure testing and leak detection. This involves pressurising the system and monitoring it for any signs of leakage. Think of this as the final exam – it proves that the system is ready for service.
Hydrostatic Testing: Using Water to Find Leaks
Hydrostatic testing involves filling the hydrogen pipe with water and pressurising it to a specified level. The pressure is then held for a period of time, and the system is monitored for any pressure drop, which would indicate a leak. Hydrostatic testing is a simple and effective method for detecting large leaks. It's like filling a bathtub to check for leaks – any water escaping indicates a problem.
Pneumatic Testing: Using Air or Nitrogen
Pneumatic testing involves pressurising the hydrogen pipe with air or nitrogen. This method is more sensitive than hydrostatic testing and can detect smaller leaks. However, it also carries a higher risk of rupture, so it's important to follow safety precautions carefully. It's like inflating a balloon to check for holes – even a tiny hole will cause the balloon to deflate.
Leak Detection Methods: Pinpointing the Source
Various leak detection methods can be used to pinpoint the source of any leaks that are detected during pressure testing. These methods include soap bubble testing, ultrasonic leak detectors, and helium leak detectors. Each method has its own advantages and disadvantages, and the choice of method will depend on the size and location of the leak. It's like using a stethoscope to listen for a heart murmur – it helps you pinpoint the source of the problem.
By meticulously following these five critical steps, you can significantly reduce the risk of leaks and ensure the safe and efficient operation of your hydrogen pipe system. Remember, a leak-proof installation is not just a matter of compliance; it's an investment in safety, efficiency, and the long-term viability of your hydrogen infrastructure.